[Ansible] #4.2 플레이북
Ansible 의 플레이북 의 YAML 형식에 대해서 알아보자.
- 1. 플레이북
- 2. 플레이북의 작업 실행 순서
- 3. 멱등성(Idempotent)
- 4. 멱등성을 제공하지 않는 예시
- 5. 핸들러(Handler)
- 6. 멱등성을 만족하지 못하는 예
- 7. 멱등성을 상황에 따라 만족하는 예
- 8. 테스트
1. 플레이북
Ansible 플레이북 YAML 로 정의하고, 하나 이상의 모듈을 이용해 하나 이상의 작업을 실행하고 해당 작업을 특정 호스트/그룹에 실행하는 하나 이상의 플레이를 가짐
플레이북: 하나 이상의플레이를 가짐플레이: 특정관리 노드/그룹을 지정해 하나 이상의작업을 가짐작업: 하나의모듈과 모듈의옵션/파라미터/아규먼트를 지정
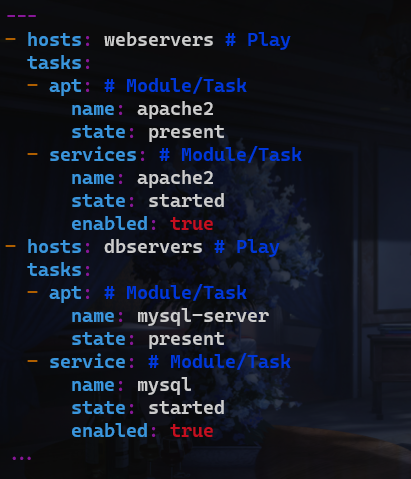
hosts 는 플레이 이며 list 로 표현되고, 그 값은 호스트/그룹 이 온다.
같은 레벨에 tasks 가 들어가고, 그 값으로 apt , service 같은 task 가 들어간다.
apt 는 또 하나의 키 로서 그 값으로 name, state 와 같은 옵션/파라미터/아규먼트 가 온다.
즉 플레이 와 task 는 list 이고, 위 파일에는 두 개의 플레이 가 존재한다.
간단한 테스트로 플레이북 파일을 생성해보자.
홈 디렉토리에서 시작한다.
mkdir test
cd test
vi test.yaml
그리고 아래 내용을 입력한다.
---
# ansible mgmt -m apt -a 'name=apache2 state=present'
# ansible mgmt -m service -a 'name=apache2 enabled=true state=started'
# ansible mgmt -m file -a 'path=/var/www/html state=directory'
# ansible mgmt -m copy -a 'src=index.html dest=/var/www/html/index.html'

- hosts: mgmt
  tasks:
  - apt:
      name: apache2
      state: present
  - service:
      name: apache2
      enabled: true
      state: started
  - file:
      path: /var/www/html
      state: directory
  - copy:
      src: index.html
      dest: /var/www/html/index.html
...
주석처리된 부분은 Ad-hoc 커맨드이다.
이를 플레이북 작성할 시 위와 같이 작성할 수 있다.
이제 index.html 파일을 작성하여 테스트해보자.
vi index.html
<html>
  <head>
    <title> hello </title>
  </head>
  <body>
    <h1> hello world </h1>
  </body>
</html>
뒤에 나오겠지만, 위 플레이북 을 실행시켜보자.
패키지 설치시에 관리자 권한이 필요하기 떄문에, -b 옵션을 붙여주자.
ansible-playbook test.yaml -b
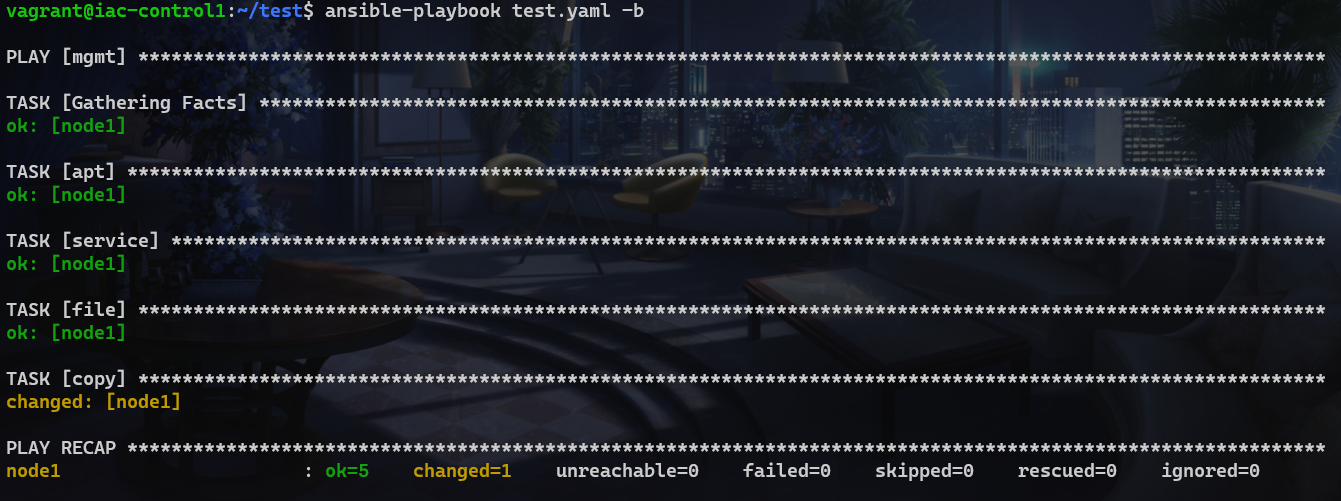
각 apt, service, file, copy 모듈이 잘 실행되었음을 확인할 수 있다.
ok 는 Ad-hoc 커맨드의 SUCCESS 와 동일하다고 생각하면 된다.
curl 192.168.56.21
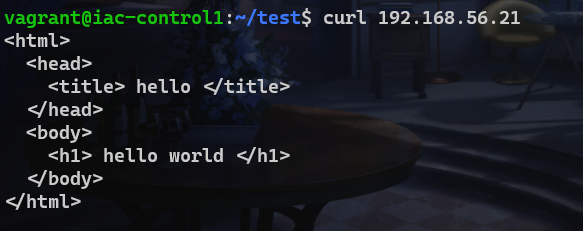
curl 을 사용하여 해당 페이지에 접속되는지를 확인할 수 있다.
+ 추가로, 모듈 을 사용하여 해당 페이지에 접속이 되는지도 플레이북으로 작성하여 테스트 할 수 있도록 해보자.
test.yaml 파일을 다음과 같이 수정한다.
---
# ansible mgmt -m apt -a 'name=apache2 state=present'
# ansible mgmt -m service -a 'name=apache2 enabled=true state=started'
# ansible mgmt -m file -a 'path=/var/www/html state=directory'
# ansible mgmt -m copy -a 'src=index.html dest=/var/www/html/index.html'
# ansible mgmt -m uri -a 'url=http://192.168.56.21 status_code=200 return_content=yes'

- hosts: mgmt
  tasks:
  - apt:
      name: apache2
      state: present
  - service:
      name: apache2
      enabled: true
      state: started
  - file:
      path: /var/www/html
      state: directory
  - copy:
      src: index.html
      dest: /var/www/html/index.html
- hosts: localhost
  tasks:
  - uri:
      url: http://192.168.56.21
      status_code: 200
      return_content: yes
...
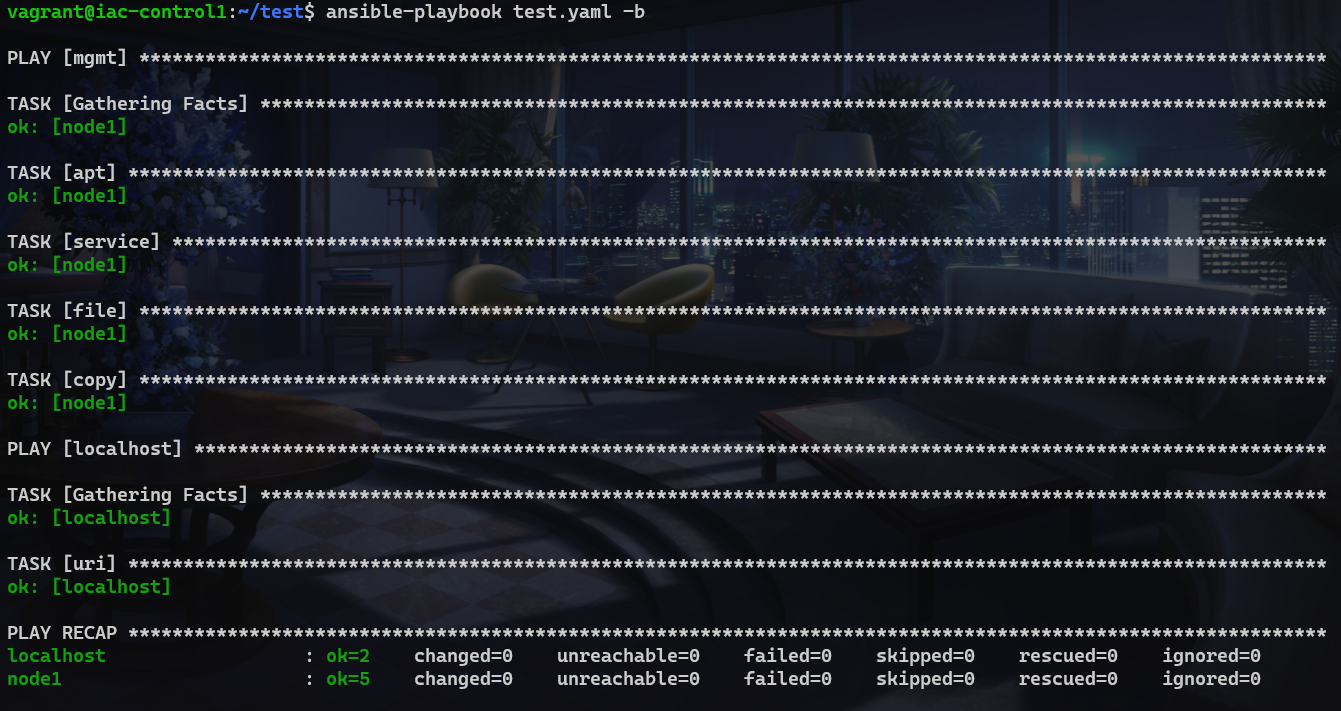
이렇게 확인 가능하다.
이후에 하는 모든 실습은 git repository 로 옮겼다.
위치는 ~/goorm-7th-ansible.
2. 플레이북의 작업 실행 순서
- 호스트의 패턴과 일치하는 모든 시스템에 대해 각 작업을 순서대로 실행
- 각 직업은 지정한 모듈 옵션을 사용하여 모듈 실행
- 하나의 작업이 호스트 패턴과 일치하는 모든 시스템에서 완료되면 다음 작업으로 이동
- 특정 호스트에서 특정 작업이 실패하면 해당 호스트는 작업이 더 남아 있더라도 제외
3. 멱등성(Idempotent)
수학이나 IT에서 연산의 한 성질을 나타낸다.
연산/작업을 여러번 적용하더라도 결과가 달라지지 않는 성질을 의미한다.
Ansible 의 대부분의 모듈은 최종적으로 원하는 상태가 달성되었는지 확인하고, 이미 원하는 최종 상태를 달성했다면 작업을 실행하지 않고, 몇번의 작업을 반복 실행하더라도 최종 상태가 변경되지 않는다.
일부 모듈 및 모듈의 옵션에 따라 멱등성을 제공하지 않는 경우도 있다.
4. 멱등성을 제공하지 않는 예시
모듈 :
- command
- shell
- raw
service 모듈의 상태에 따라 :
- state : restarted
5. 핸들러(Handler)
특정 작업이 실행되어 변경 사항이 발생한 경우에만 실행해야 하는 작업이 있는데, 이 작업을 핸들러라고 한다.
대표적인 예는 설정 파일을 복사해서 서비스를 재시작 해야하는 경우이다.
서비스를 항상 재시작하는 것은 멱등성을 만족하지 못한다.
핸들러는 작업에 변경 사항이 발생한 경우에만 실행할 작업이다.
6. 멱등성을 만족하지 못하는 예
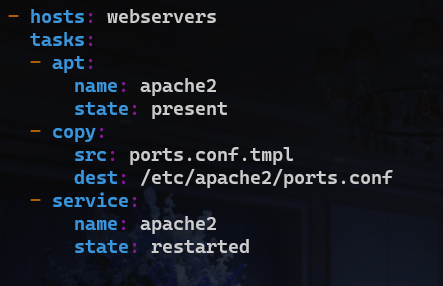
이런식으로 매번 서비스를 재시작 하는것은 바람직하지 않다.
설정 파일이 복사되었을때만 재시작 하는것이 바람직하다.
7. 멱등성을 상황에 따라 만족하는 예
–
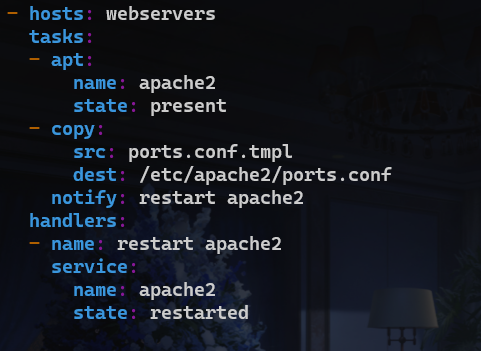
핸들러 작업은 매번 실행하는 작업이 아니라 특정 조건에서만 싫애되는 작업이다.
그 조건이 바로 알림 을 받았을 때이며, 알림 을 보내는 조건은 해당되는 모듈의 changed 가 true 인 경우이다.
이제 copy 가 이루어지면 알림 이 전송되고, 알림을 받은 작업은 실행을 하게 된다.
알림이 notify 이고 해당 값인 restart apache2 라는 알림 을 핸들러 가 받아서 작업을 실행한다.
만약 이미 똑같은 ports.conf 가 이미 존재해서 changed 가 false 이면, 변경이 없기 때문에 notify 즉 알림이 전송되지 않으므로 핸들러 작업이 실행되지 않는다.
핸들러를 사용하는 주된 첫 번째 이유는 서비스를 언제 재시작하냐를 지정하는 것이다.
8. 테스트
핸들러 추가
~/goorm-7th-ansible/01_playbook 에서 시작.
ssh 192.168.56.21 cat /etc/apache2/ports.conf
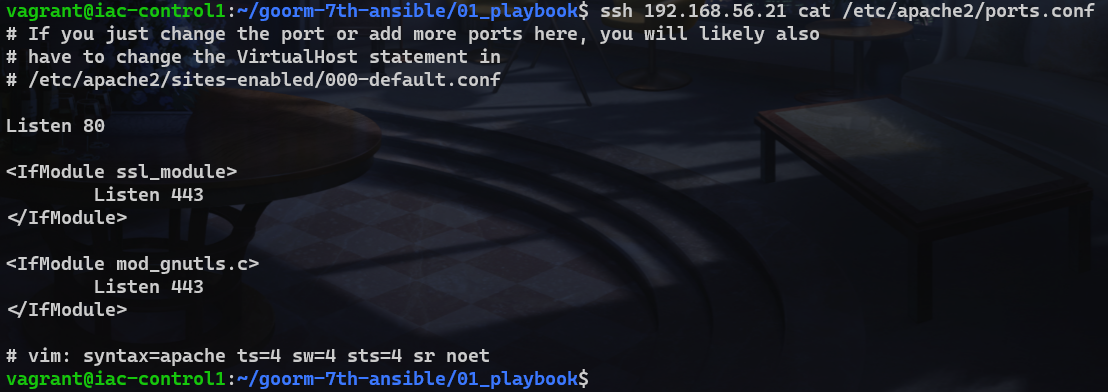
여기에서 다음의 내용을 복사한다.
Listen 80

<IfModule ssl_module>
        Listen 443
</IfModule>

<IfModule mod_gnutls.c>
        Listen 443
</IfModule>
vi ports.conf.tpl
해당 파일에 붙여넣는다.
tpl 은 템플릿이라는 뜻이다.
이제 test.yaml 파일을 다음과 같이 수정한다.
---
# ansible mgmt -m apt -a 'name=apache2 state=present'
# ansible mgmt -m service -a 'name=apache2 enabled=true state=started'
# ansible mgmt -m file -a 'path=/var/www/html state=directory'
# ansible mgmt -m copy -a 'src=index.html dest=/var/www/html/index.html'
# ansible mgmt -m uri -a 'url=http://192.168.56.21 status_code=200 return_content=yes'

- hosts: mgmt
  tasks:
  - apt:
      name: apache2
      state: present
  - service:
      name: apache2
      enabled: true
      state: started
  - copy:
      src: ports.conf.tpl
      dest: /etc/apache2/ports.conf
    notify: restart service
  - file:
      path: /var/www/html
      state: directory
  - copy:
      src: index.html
      dest: /var/www/html/index.html
  handlers:
  - name: restart service
    service:
      name: apache2
      state: restarted
- hosts: localhost
  tasks:
  - uri:
      url: http://192.168.56.21
      status_code: 200
      return_content: yes
...
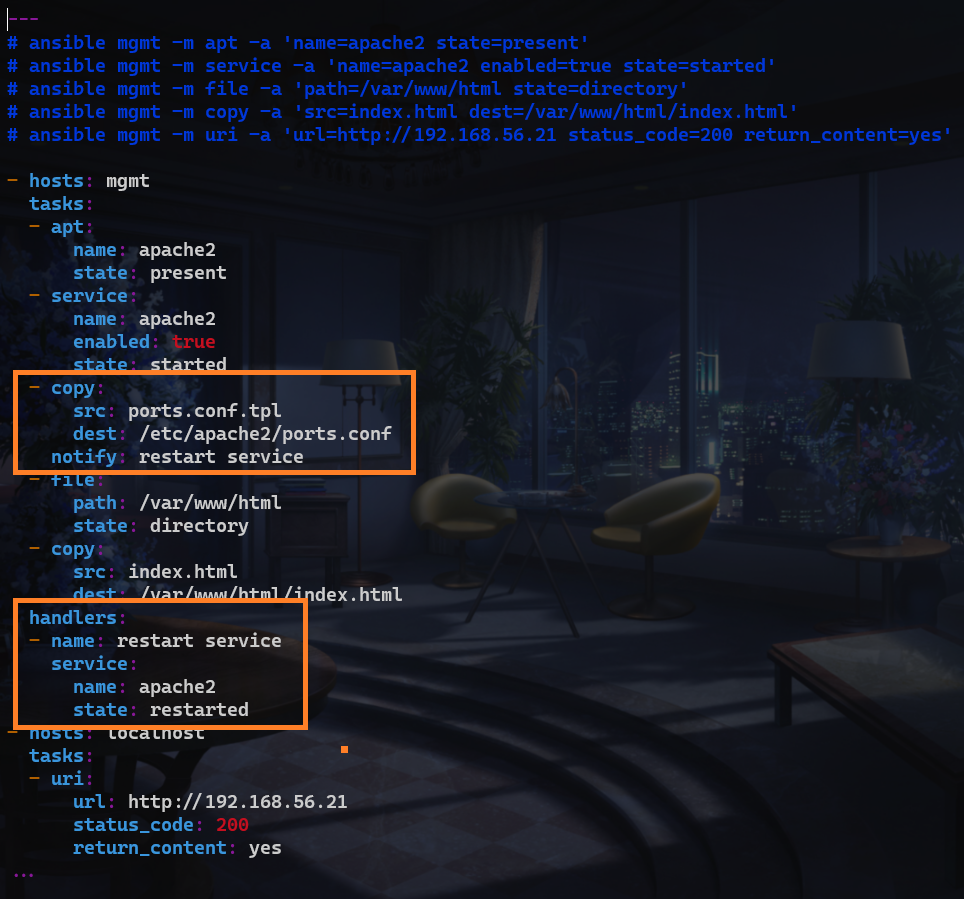
설정 파일을 복사하는 copy 모듈과 handler 를 추가하였다.
이제 플레이북을 실행시키자.
ansible-playbook test.yaml -b
copy 모듈에서 변경사항이 발생하였기 때문에(changed), 모든 작업이 실행되고 난 뒤 핸들러 가 실행되었음을 확인할 수 있다.
플레이북 을 한 번 더 실행하면, 이미 동일한 설정 파일이 존재하기 때문에 변경사항이 없으므로 핸들러가 실행되지 않는다.
즉 멱등성이 지켜지고 있다는 뜻이다.
참고로 Gathering Facks 는 플레이 를 실행할 떄 항상 처음에 실행되는 것이라고 생각하면 된다.
당장은 그 정도만 알고 넘어가자.
name 추가
그런데 지금 copy 모듈이 2개라 각 copy 가 어떤 역할을 수행하는지 조금 헷갈린다.
이를 개선해보도록 하자.
test.yaml 파일을 다음과 같이 수정한다.
---
# ansible mgmt -m apt -a 'name=apache2 state=present'
# ansible mgmt -m service -a 'name=apache2 enabled=true state=started'
# ansible mgmt -m file -a 'path=/var/www/html state=directory'
# ansible mgmt -m copy -a 'src=index.html dest=/var/www/html/index.html'
# ansible mgmt -m uri -a 'url=http://192.168.56.21 status_code=200 return_content=yes'

- name: Install Web Server
  hosts: mgmt
  tasks:
  - name: Install Apache2 Package
    apt:
      name: apache2
      state: present
  - name: Checking Apache Service with Running
    service:
      name: apache2
      enabled: true
      state: started
  - name: Change Apache Service Port
    copy:
      src: ports.conf.tpl
      dest: /etc/apache2/ports.conf
    notify: Restart Apache2 Service
  - name: Checking Web Contents Directory
    file:
      path: /var/www/html
      state: directory
  - name: Copy Web Contents
    copy:
      src: index.html
      dest: /var/www/html/index.html
  handlers:
  - name: Restart Apache2 Service
    service:
      name: apache2
      state: restarted
- name: Remote Access Check
  hosts: localhost
  tasks:
  - name: Access Check
    uri:
      url: http://192.168.56.21
      status_code: 200
      return_content: yes
...
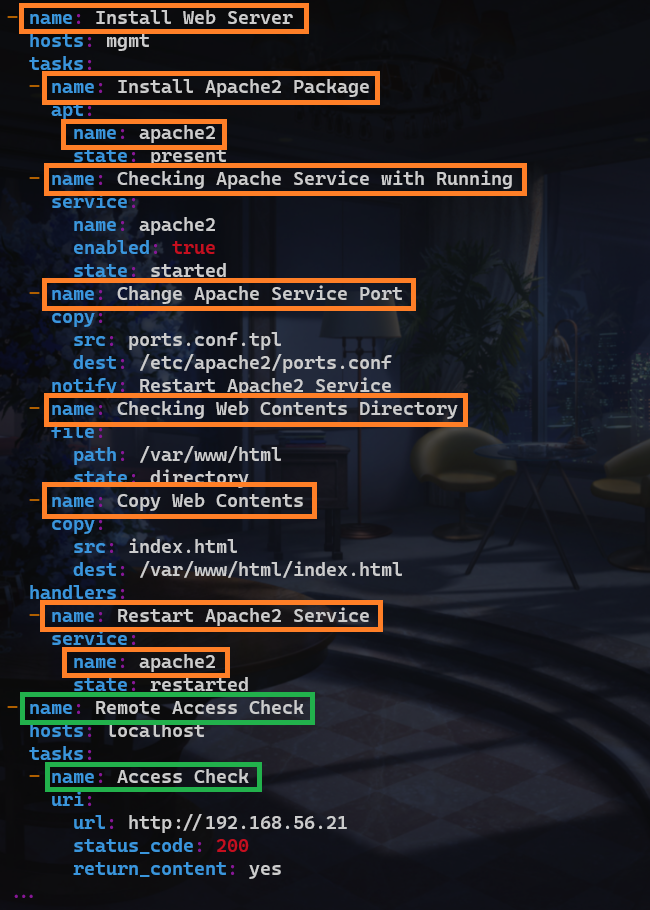
각 플레이, 모듈, 핸들러에 name 으로 이름을 붙여주었다.
이제 다시 플레이북 을 실행해보자.
ansible-playbook test.yaml -b
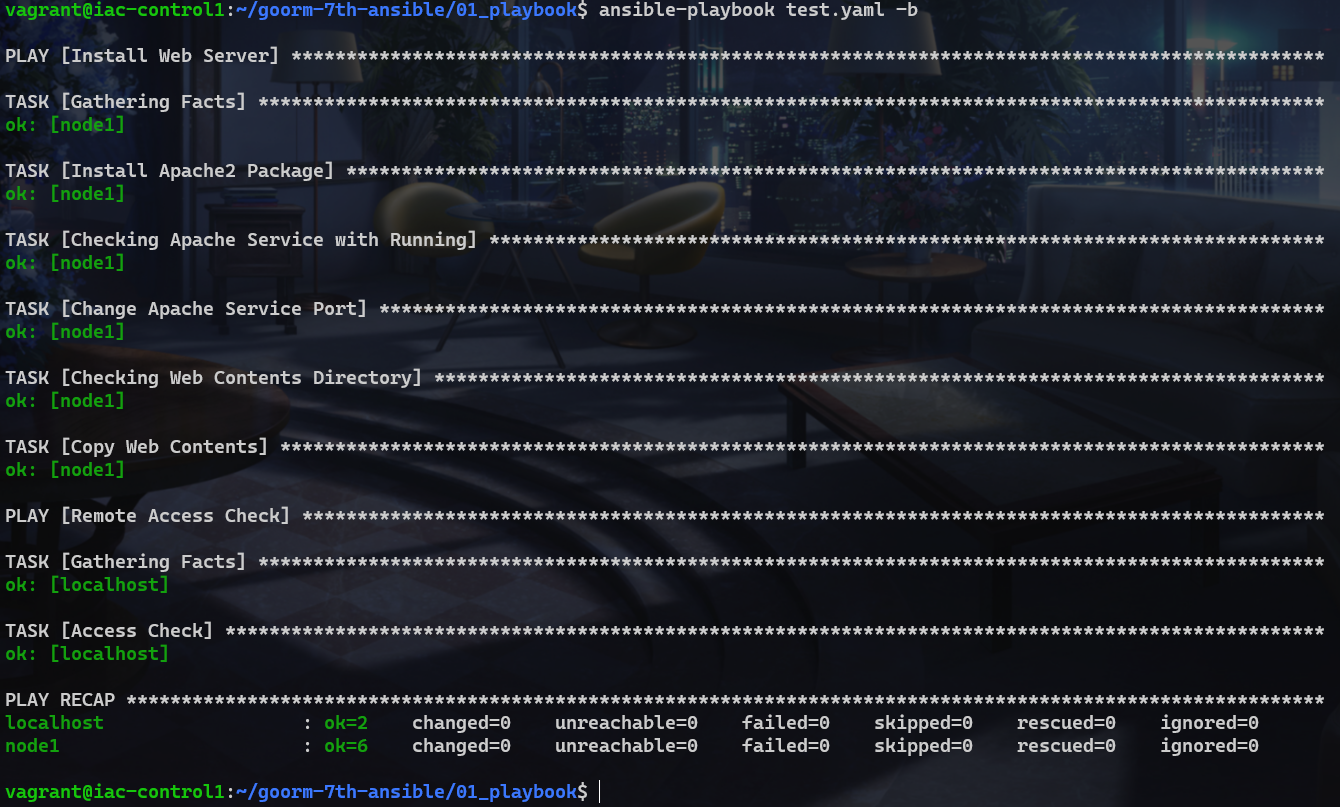
더 보기 편해졌다.
become 추가
또 추가적으로, 매번 become 옵션을 넣기 귀찮다면 플레이 에 become: true 를 넣음으로써 생략할 수 있다.
최종적인 test.yaml 은 다음과 같다.
---
# ansible mgmt -m apt -a 'name=apache2 state=present'
# ansible mgmt -m service -a 'name=apache2 enabled=true state=started'
# ansible mgmt -m file -a 'path=/var/www/html state=directory'
# ansible mgmt -m copy -a 'src=index.html dest=/var/www/html/index.html'
# ansible mgmt -m uri -a 'url=http://192.168.56.21 status_code=200 return_content=yes'

- name: Install Web Server
  hosts: mgmt
  become: true
  tasks:
  - name: Install Apache2 Package
    apt:
      name: apache2
      state: present
  - name: Checking Apache Service with Running
    service:
      name: apache2
      enabled: true
      state: started
  - name: Change Apache Service Port
    copy:
      src: ports.conf.tpl
      dest: /etc/apache2/ports.conf
    notify: Restart Apache2 Service
  - name: Checking Web Contents Directory
    file:
      path: /var/www/html
      state: directory
  - name: Copy Web Contents
    copy:
      src: index.html
      dest: /var/www/html/index.html
  handlers:
  - name: Restart Apache2 Service
    service:
      name: apache2
      state: restarted
- name: Remote Access Check
  hosts: localhost
  tasks:
  - name: Access Check
    uri:
      url: http://192.168.56.21
      status_code: 200
      return_content: yes
...
계속 test 라고 쓰기는 애매해서 파일명을 install.yaml 로 바꾸어 주었다.
mv test.yaml install.yaml
remove.yaml
apache2 웹 서버를 생성하는 플레이북을 만들었으니, 제거하는 플레이북도 만들어보자.
vi remove.yaml
아래 내용을 넣는다.
---
- name: Remove Apache2
  hosts: mgmt
  become: true

  tasks:
  - name: Stop Apache2 Service
    service:
      name: apache2
      state: stopped
    ignore_errors: true
  - name: Remove Web Contents
    file:
      path: /var/www/html
      state: absent
  - name: Remove Apache2 Package
    apt:
      name: apache2
      state: absent
      autoremove: true
      purge: true
...
ansible-playbook remove.yaml
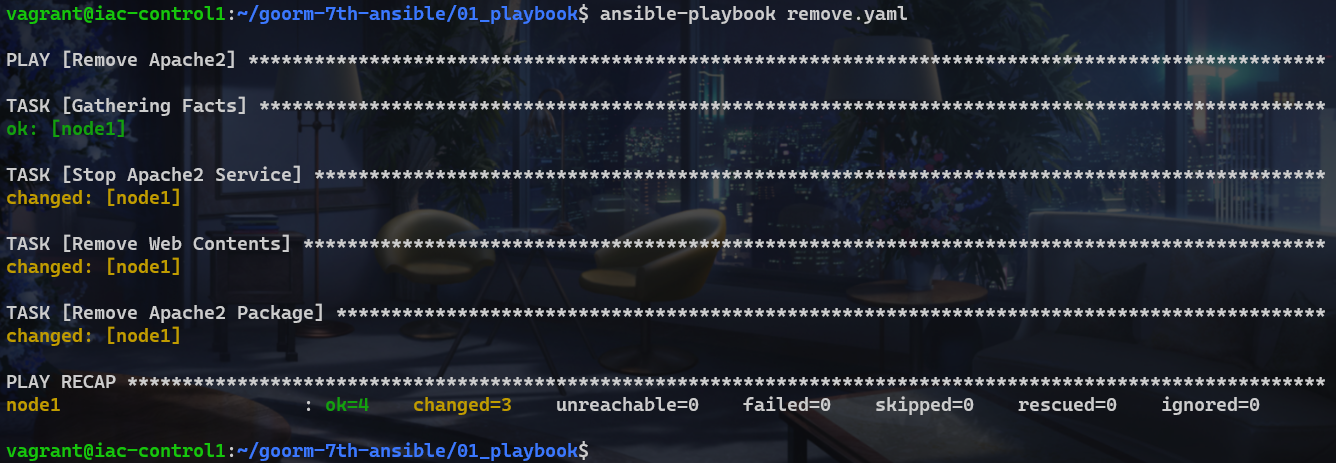
성공적으로 제거되었다.